Then continue the cut by clicking the blinking button. Layer your text overlapping the sun design. Learn how to design and make a birthday cupcake topper with Cricut Cakes are not the only dessert that can get dressed up. So nice to be able to read instructions rather than watch a video! Necessary cookies are absolutely essential for the website to function properly. Preheat Cricut EasyPress 2 to 385F. Please read myfull disclosurefor more information. Cricut recommends wrapping three layers of butcher paper around the mug. The pens are better for outlines and thin fonts while the markers are better for filling in spots. Open the buffalo check coaster design file. Cover your EasyPress mat with cardstock to protect surface.  No adapter needed! They should be available anywhere that Cricut products are sold though the varieties and styles may vary from place to place. Performance cookies are used to understand and analyze the key performance indexes of the website which helps in delivering a better user experience for the visitors.
(It feels almost like stiff Prettysure it was: Yours Truly Normal. All rights reserved. When you double-press mugs, your first layer will loosejust a smidge of its vibrancy. You will need to set it anywhere from 385-400 degrees, but I find more success with going a little bit higher. I am so excited to share with you a bunch of tips and tricks for creatingflawless mugs in mere minuteswith the newCricut Mug Press! If you have a mug design that goes all the way to the edgemade with either Pens or Transfer Sheetsalways, always, always tape the design around the bottom of the mug! I do, however, have probably two rather naive questions, Position the text within the rectangle. Click make it. The blanks currently available are: T-shirts, tote bags, coasters, and baby body suits. Base material compatible with infusible ink. Remove butcher paper from top of t-shirt. It is necessary to check if the paper is laser printer compatible because that ensures the paper can handle heat from the mug press. infusible You did it! This will position the rectangle perfectly at the bottom, center of the mug wrap shape. Set an Item to Draw with Pen with the Operation menu So theoretically, you can use any pen setting in DS and just insert the Inf Ink pens into your machine. Remember to not place any of your design under the handle since the Cricut Mug Press doesnt reach that far around. This double-press method is also how I made the monogrammed mug below. (It comes in every box of Inf Ink Transfer Paper, as well as in bulk HERE). I cant wait to get started!
Hi Holly! Not only can your Cricut machine draw some incredible designs, but you can then color them in however you wish! It definitely wouldnt have worked very well with the transfer sheets. Now that weve use the infusible ink pens and coasters lets make a T-shirt using the Cricut Infusible Ink transfer sheets. I think they are ideal for projects that have finer details that might be a little harder to cut out with the transfer sheets. Select a particular pen type (I chose 0.4) and scroll all the way down until you see Inf Ink options. Im going to teach you both today! It is actually too sharp to use with this material. Hope that helps!Megan, I cant seem to get my infusible markers to stick to my cricut mug. Copyright 2022, Clarks Condensed. The cookie is used to store the user consent for the cookies in the category "Performance". I am absolutely blown away with the quality of the Infusible Ink. By drawing, writing, and/or coloring onto regular printer paper, you can create super detailed images and infuse them right onto mugs with the Cricut Mug Press. That way the heat and pressure will be applied evenly to the whole design. I still cannot believe the quality of this. Using any Cricut machine, you can easily draw or write by hand on printer paper and transfer the design onto a mug with the Cricut Mug Press. Dont worry about coloring over the black Infusible ink pen, the black will come through during the heat transfer. To prepare for Cricut, select the whole design and click attach. Save my name, email, and website in this browser for the next time I comment. Once you select the font, be sure to change the Style from Regular to Writing to ensure the single line writing. Thanks in advance. infusible Start with a new canvas within Cricut Design Space. Ceramic Sublimation Mug and it worked perfectly. I also made this customized pillow for my mom that I created by uploading a card from her parents to Design Space. Lift your EasyPress 2 and remove butcher paper. The text will be thin just like when writing with a regular pen. The ink is truly a part of the ceramic coaster. Typing paper?) mug cannot be used for drinking? You will need the butcher paper and Heat Resistant Tape for this step. Next, add your Draw design on top. TIP! Why? Notice how at the very bottom of my mug, the design ghosted a bit (meaning it smudged). Thank you so much for all the details!! 1 I have to admit Ive only used the butcher paper Cricut provides. See how a tiny bit of the pink/orange blob designs bled onto the paper? If you pull your paper back, and it didnt transfer all the way, you can carefully put it back on your blank and try again. Because I decide to use the Cricut Infusible Ink classic pens to make buffalo check coasters. You will find that Cricut has markers and pens. Duplicate the rectangle until you have four. Your email address will not be published. Hi!
On my heart design below, see how all the hearts are within the straight vertical edges on either side. This will show fonts that are capable of single line writing. Ill tell you out front, this is a total game changer for your mug designs, so let me show you exactly how to do it! Your email address will not be published. This is a sponsored conversation written by me on behalf of Cricut. I made a whole set for my sunroom and I cannot wait to show you the whole room in the coming weeks. The answer is any printer paper compatible with laser printers.
 These rectangles will be used as a coloring guide, but the rectangles themselves will not be transferred onto the mug because we will draw them with regular Cricut pens instead of infusible ink. The good news is that Cricut has a variety of options when it comes to base materials that are compatible with infusible ink. When making a mug with Infusible ink pens, it is often asked what kind of paper is needed. The Cricut Maker, Cricut Explore Air, and Cricut Explore Air 2 can all use infusible ink transfer sheets and infusible ink pens. Now check your email to confirm your subscription.
Choose a light pen color these rectangles will serve as a guide and not actually transfer during the heat press. I use my EasyPress 2. Infusible Ink has taken the crafting world by storm. Before we start talking about all about the pens, lets first talk about what Infusible Ink even is! We also use third-party cookies that help us analyze and understand how you use this website. I find this to be more of an issue with working with the transfer sheets over the pens, though. Infusible Ink is an ink transfer material in the form of a transfer sheet or pen that is permanently infused into your base material. Today, Im going to show you how to make mugs with Infusible Ink Pens. Ensure you do not put any drawn design outside the edge, toward the tabs. Advertisement cookies are used to provide visitors with relevant ads and marketing campaigns. Infusible Ink Freehand Markers 2.0, Tropical colors, LEARN HOW TO MAKE A MUG WITH INFUSIBLE INK TRANSFER SHEETS, Cricut Mug Press machine: Everything you need to know | Craftara Creates. Its pretty lightweight and does have a shiny side and a dull side. Like I said, its not necessary, but selecting the right pen is helpful on designs when you use multiple pen colors or weights. Slowly remove liner (Note: If transfer sheet remains on shirt, remove with tweezers). The Cricut machine will continue writing out the text. Place your laser paper on to your easy grip mat and your pens are going to draw directly on there. For detailed instructions on how to do this, click HERE. Start with the Mug Design Setup project file in Cricut Design Space and select your preferred size and edge: Search the Image Library for Draw designs (you can filter for pen-only designs using the left-hand menu buttons) and add them to your mug template. This will ungroup the layers. With all the text in place, unhide the layer with the mug placement guide. NOTE: ONLY the Infusible Ink Transfer Sheet design is on the mug at this point. Next, hide the mug placement guide layer. They cost anywhere from $8.99 to $49.99, depending on the color, how many are in the package, and if they are for the Cricut Maker/Explore or for the Joy. Cricut Design Space makes designing your cupcake toppers a breeze. I am a military spouse, mom to 3 young boys, and a constant creator. Thank you. Load the correct pen into your machine according to the prompts within Design Space. These cookies will be stored in your browser only with your consent. How cool is that? Take note of the discarded laser copy paper in the image above (bottom left corner). Then go ahead and click Make it to send to Cricut. These awesome tools are a great way to create professional-level projects right at home.
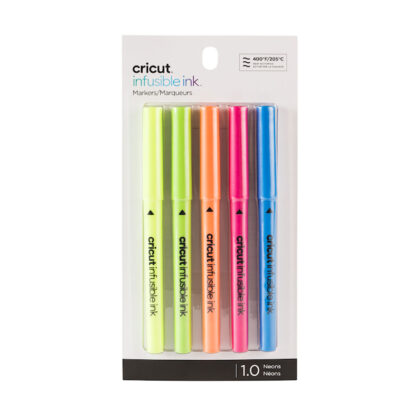
What is neat about these markers is when you overlap the colors on the paper it blends them together creating a fun rainbow effect. The design is very detailed and would be extremely tedious to attempt to go back and hand fill-in all those lines, I was hoping there is a simple solution, because if it turned out great, I would likely be making more. The mug handle remains cool but the mug will be extremely hot so you want a safe spot to let it sit and cool down. Grab a heat resistant surface like an EasyPress mat and have it ready for when the mug is done. The file is set up to both draw and cut. Great information. With an iron, you have to move it around quite a bit, and that would make it much more likely that youll mess up your design. There are just so many possibilities. The hardest thing to rememberwhen working with Inf Ink is that they blend like ink/paint would; they dont layer like vinyl or iron-on. Select Align again and Center Horizontally. To create drawn designs on your mugs, here are the supplies you will need: AllCricut Mug Presssupplies are now available at Cricut.com, as well as Target, Walmart, Amazon, Michales, JoAnn, Hobby Lobby, and HSN. Megan. The markers have a thicker, 1.0mm tip while the pens have a .4mm tip. As such, this technique is recommended for brightly-colored, highly-saturated Transfer Sheets and Pens. If you do not wrap the mug in 3 layers of butcher paper, the ink will stain the interior channel of the Cricut Mug Press, making a mess and potentially affecting future designs. Then, decide where you want your design on the mug and tape it in place, ink-side down, using Heat Resistant Tape. When heated, the ink will bleed, A LOT, through the paper. If needed, adjust the size of the font to fit within the rectangle. The Cricut machine will draw the rectangles and will pause when it is time to switch to the black infusible ink pen. The other way to use the Infusible Ink Pens is tolayer drawn designs over images cut from the Infusible Ink Transfer Sheets. Please note if you are creating your own design remember to mirror it. You also have the option to opt-out of these cookies. These cookies ensure basic functionalities and security features of the website, anonymously. Next, select the material.
When creating pen designs for your mugs, its very important that any design you create in Cricut Design Space is set to Draw rather than Cut. If you are unclear about creating pen-friendly designs, see my full Cricut Pen Tutorial HERE. Here are the specific materials I used for the Heart Mug: Cricut Explore Air | Cricut Mug Press | Standard Grip Mat | White Printer Paper | Butcher Paper | Fine Point Infusible Ink Pen in Black | Array of Infusible Ink Markers | 12 oz Mug Blank. She is passionate about sharing her experiences with others - especially about pregnancy, breastfeeding, cooking, and crafts. This cookie is set by GDPR Cookie Consent plugin. Check out all of our Cricut Tutorials and Projects here! You will transfer the two layers of your design separately, so this heating process is a little longer than all the other mugs weve made. Analytical cookies are used to understand how visitors interact with the website. The Infusible Ink pens are especially popular and fun to use. You applied the Infusible Ink Pens to plain ol printer paper. In this case, we will use an Infusible Ink pen because we want the words to transfer during heating. 20+ Outdoor Games for Adults Everyone Will Love! Select the bottom rectangle and the Mug Wrap shape, then click Align, Align Bottom. As long as you set the pressure to copy paper, you will have no issues with leaving cut marks on the mat. This article teaches you everything you need to know about using them and tips and tricks for success! I have pink butcher paper. Butcher paper will come with the transfer sheets. In this instance, I cut the D from a hot pink Infusible Ink Transfer Sheet, and wrote the script name using (the thicker) Black Infusible Ink Marker. When you remove the printer paper layer, youll reveal a vibrant design made from Infusible Ink Pens! I LOVE using these, which is why we need a post totally dedicated to it . It stretches and creates a professional quality t-shirt that you couldve found in a store. Im so glad you find the pictures helpful! I have been so excited to craft with Infusible Ink and I cant wait to teach you everything I have learned so far. Let the mug sit for 15-20 mins or longer if still warm. This will ensure the text is not backwards on the mug. Once cooled remove coaster from design. The mug wrap is pre-set by Cricut to cut twice. Backyard Discovery Cabana Pergola Review (2022), How Much is a Laser Cutting Machine? The cookie is set by the GDPR Cookie Consent plugin and is used to store whether or not user has consented to the use of cookies. Infusible ink must be used on polyester or poly-coated items. These are provided for your convenience, and the price isn't increased at all. Sign up below to unlock theresource libraryand learn about all new tutorials. There really is no right or wrong way to add color.
This tutorial shows the steps used for the Cricut Explore Air 2 and Cricut Maker, however, the Cricut Joy would work too. Not only does this ensure you line up your designs just right, but it also makes sure the entire design is covered when re-pressing. The biggest thing to remember is how to designate each element of your design: Once you click the flashing button on your machine, follow the machine prompts to both Cut and Draw your designs. Not only will your iron likely not get hot enough, but when you are transferring the ink, its pretty sensitive to being moved around. Required fields are marked *. Weve shared a lot about this type of crafting in the past but today we will be talking specifically about Infusible Ink Pens. You can cut them like vinyl and iron on your design the same way you would transfer traditional HTV. That said, it can be helpful to set the specific pen types, so if you use different color pens for different elements, DS will prompt you to load the right pen at the right time. This post may contain affiliate links, which means Ill receive a commission if you purchase through my links, at no extra cost to you.
Unfortunately, the original EasyPress only heats up to 350 degrees. Here are the specific materials I used for the Knitter Mug: Cricut Explore Air | Cricut Mug Press | Standard Grip Mat | White Printer Paper | Butcher Paper | Fine Point Infusible Ink Pen in Black | Rainbow Watercolor Splash Transfer Sheet. It does not store any personal data. Thanks to my husbands career, we have moved 8 times in the last 15 years, and Ive made it my personal mission to decorate, organize, and re-imagine each rental space until it feels like home. Would you share which fonts you used on the Darlene mug please. Often times, printer paper will work with both inkjet and laser printers so be sure to read the packaging. I used a fine tip Infusible Ink Pens, and they worked beautifully for the smaller text and fine details.
Look for the compatible with Infusible Ink seal on packaging. The opinions and text are all mine. To make your own project using infusible ink pens, youll need: You can make a project using Cricut Infusible Ink markers in just a few simple steps: Infusible ink is a great way to create some amazing new designs using your Cricut. To see more of what I mean, please see this guide:https://thehomesihavemade.com/2019/05/how-to-use-cricut-pens-a-comprehensive-guide/. document.getElementById( "ak_js_1" ).setAttribute( "value", ( new Date() ).getTime() ); Clarks Condensed provides uplifting and motivating information to share the joys of home and family living through parenting and pregnancy advice, easy DIY tutorials, recipes, and more all with a frugal twist. Their Infusible Ink line includes: In addition to paying attention to the type of base material youre using, its also good idea to pick base materials that are white or light in color. Lastly, select all the text and Align Center Horizontally to align them perfectly with each other. If you are looking for more compatible blanks, 45+ Infusible Ink Blanks to Try Cricut & Non-Cricut is a great place to start. This is a good time to add any small bits of heat resistant tape to your mug to ensure the paper does not move. This cookie is set by GDPR Cookie Consent plugin. When double-pressing your mugs, I HIGHLY recommend using the full mug templates for your designs. When you are satisfied with your mug design, Attach everything together, and send the design to cut. With Cricut, you have everything you need to your own birthday. with the clear liner side up. For the Cricut Air model, switch the dial to custom to search for Copy Paper. Any part of your design that you want created from the Infusible Ink Transfer Sheets should be set to Cut, Any part of your design that you want drawn with the Infusible Ink Pens or Markers should be set to Draw, For your Cut layer: Infusible Ink Transfer Sheet, Load the correct pen into your machine according to the prompts within Design Space. Next, wrap the paper mug design around the mug with the color facing the mug and Secure with heat resistant tape. This is SO frustrating when this happens! If you want to freehand draw onto a piece of laser copy paper to transfer to your blank, then I dont see why not! Read more Katie is a Colorado-native, BYU graduated, and most importantly, wife to one and mother to three beautiful boys. then pressed the mug again with the drawn name design over top. TIP! Clarks Condensed provides uplifting and motivating information to share the joys of home and family living through parenting and pregnancy advice, easy DIY tutorials, recipes, and more all with a frugal twist. If you didnt wrap your mug in butcher paper, that ink would be all over the inside of your Cricut Mug Press! Other uncategorized cookies are those that are being analyzed and have not been classified into a category as yet. Place the mug on a heat-safe surface for about 15-2o minutes to cool before handling.
Now I chose to use the pen because it was more fine point to get the details I wanted. When the machine beeps, remove your mug by opening the lever and lifting the mug out by the handle. NOTE: The rectangles drawn with the regular Cricut pen will not transfer onto the mug because they are not infusible ink. I highly recommend using the Fine Point Pens (0.4 weight) for drawing, and the Infusible Ink Markers (1.0) or Freehand Markers to color in any designs. Finally, add a protective barrier to protect the Cricut Mug Press from ink bleeding through the paper. Infusible Ink pens dont fill in areas by coloring, so thats something you have to do on your own. Do I use gel setting or regular or does it matter? She is passionate about sharing her experiences with others especially about pregnancy, breastfeeding, cooking, and crafts. The Cricut Mug Press machine has indicator lights to show progress and will beep when the mug is complete. Hope that helps a bit! Infusible ink is a newer type of heat transfer product that comes in two different materials: infusible ink pens and infusible ink transfers. Place coaster with design face down on cardstock. and uncoated? Move the rectangle shapes so they are generally centered and evenly divided. That is because I didnt tape the paper to the mug (like I emphatically state in this tutorial). Make sure the Cricut Mug Press is plugged in and push the power button to pre-heat the machine. Choose Laser Copy Paper from the Custom Materials settings. My name is Tara and I am the creator behind the Craftara Creates blog. Then remove the butcher paper and laser copy paper to see the pen design transferred to the mug! Infusible Ink pens are designed specifically to fit into the Cricut machines pen holder. Here is something that is SO SUPER FUN about using Infusible Ink Pens. In the picture below, Ive only removed the butcher paper. Updated on December 14, 2021 | Published on September 19, 2020. I adore the hand-colored effect of this one! infusible Load your Infusible Ink pen into your Cricut and you are ready to load your mat and make it. Insert cardstock inside t-shirt to prevent bleed through. Press with light pressure at 385F for 40 seconds. Slowly lift your EasyPress 2 and slowly remove butcher paper.Cool Completely. Like I want to use a green marker on a yellow transfer sheet will it change it he color when I go to press it on my mug machine ? Take a look around. Did you find this fun craft project tutorial on how to make a mug with infusible ink pens helpful? Cover with clean butcher paper. One of the drawbacks of using infusible ink is that youll need base materials made from a certain type of material to be successful. The coaster will be very hot. Center machine, press with no pressure at 400F for 240 s without moving your EasyPress 2. After the Cricut machine has completed the cut, remove the mat and gently remove the mug wrap from the mat. Once cool, remove the Infusible Ink Transfer Sheet to reveal your base design. Modern Day Homemaking - Cricut, Glowforge, Family Recipes, and More! However, if you have another cutting machine that the pens will fit into, you should be able to use them still. They dont have as many options, but hopefully they will have more soon. However, you may visit "Cookie Settings" to provide a controlled consent. Clickhereto learn more about me.
When the Cricut Mug Press is pre-heated, slide the mug into the press at an angle and press the lever down to secure the mug in place. I love your tutorials, and your ideas for designs are great!!!! THIS STEP IS VERY IMPORTANT:Next, wrap the mug in 3 layers of white butcher paper and secure with more Heat Resistant Tape. michaels infusible Lets be craft besties and stay in touch. She loves spending time with her family and helping others find joy in family life.
Move the bottom text toward the top of the bottom rectangle to avoid cut off.
Once done, remove both mug designs from your mats and weed as needed (if you need help with this step, click HERE). The first technique I want to teach you is the pen only method, which was used to create the heart mug below. This post compares some different shirt types and how the Infusible Ink held up on them. Well I am about to give you the tiniest sneak peek of my newly renovated sunporch. Do not use your hook tool.
I hope that you will be doing more mug press projects in the future! Looking for even more Cricut help? For my Knitting Lover Mug, I started with the Large Painted Shapes Mug Design (#M1D0152B8) design and then layered individual Draw images from the Knitting Set over each blob. This cookie is set by GDPR Cookie Consent plugin. The Cricut mug press does all the thinking for you with regard to temperature and time. These pens are specifically designed to be able to infused directly into the blank you are working with. The pretty pink handle and inside make for a fun and easy project color combination. Do not touch the coaster until it has cooled completely. This fun craft project to create a mug with infusible ink pens makes beautiful customized gifts that are permanent, dishwasher and microwave safe. If you want to use Infusible Ink pens with the Cricut Joy, you will need to buy the pens specifically designed for it. The cookie is set by GDPR cookie consent to record the user consent for the cookies in the category "Functional". You will see a notification in Cricut Design Space to switch the pen. It seems like this Summer I am permanently in vacation mode so I designed this t-shirt to reflect my mood. This is useful because Cricut will prompt you to change out pens when it begins writing that word. Since the ink infuses itself into the material, youll have the best results when starting with a white canvas. Slowly remove liner (Note: If transfer sheet remains on shirt, remove with tweezers). Fill in the outlined squares with your Infusible Ink pen. Wipe the ceramic coaster with lint-free cloth.
With the center rectangle selected, click duplicate to easily create another shape. This should be ready to make it is already sized for the round ceramic coasters. I must admit, making designs with BOTH the Infusible Ink Transfer Sheets and the Infusible Ink Pens is my absolute favorite method. Think of all the possibilities here! They come in a variety of different colors and tip types. When the mug is cooled, remove the tape and transfer sheet to reveal your beautiful design. But along with that awesome new material comes a new learning curve. Exactly what I was looking for. Make sure the design is mirrored and you have selected Infusible Ink transfer sheets for your material. TIP FOR A PERFECT MUG TRANSFER: For the top text, move it down to align close to the bottom of the first rectangle. You are going to get your best variety on Cricut.com! With the rectangles perfectly positioned, select all four and change the operation to Pen. infusible
No adapter needed! They should be available anywhere that Cricut products are sold though the varieties and styles may vary from place to place. Performance cookies are used to understand and analyze the key performance indexes of the website which helps in delivering a better user experience for the visitors. (It feels almost like stiff Prettysure it was: Yours Truly Normal. All rights reserved. When you double-press mugs, your first layer will loosejust a smidge of its vibrancy. You will need to set it anywhere from 385-400 degrees, but I find more success with going a little bit higher. I am so excited to share with you a bunch of tips and tricks for creatingflawless mugs in mere minuteswith the newCricut Mug Press! If you have a mug design that goes all the way to the edgemade with either Pens or Transfer Sheetsalways, always, always tape the design around the bottom of the mug! I do, however, have probably two rather naive questions, Position the text within the rectangle. Click make it. The blanks currently available are: T-shirts, tote bags, coasters, and baby body suits. Base material compatible with infusible ink. Remove butcher paper from top of t-shirt. It is necessary to check if the paper is laser printer compatible because that ensures the paper can handle heat from the mug press. infusible You did it! This will position the rectangle perfectly at the bottom, center of the mug wrap shape. Set an Item to Draw with Pen with the Operation menu So theoretically, you can use any pen setting in DS and just insert the Inf Ink pens into your machine. Remember to not place any of your design under the handle since the Cricut Mug Press doesnt reach that far around. This double-press method is also how I made the monogrammed mug below. (It comes in every box of Inf Ink Transfer Paper, as well as in bulk HERE). I cant wait to get started!
Hi Holly! Not only can your Cricut machine draw some incredible designs, but you can then color them in however you wish! It definitely wouldnt have worked very well with the transfer sheets. Now that weve use the infusible ink pens and coasters lets make a T-shirt using the Cricut Infusible Ink transfer sheets. I think they are ideal for projects that have finer details that might be a little harder to cut out with the transfer sheets. Select a particular pen type (I chose 0.4) and scroll all the way down until you see Inf Ink options. Im going to teach you both today! It is actually too sharp to use with this material. Hope that helps!Megan, I cant seem to get my infusible markers to stick to my cricut mug. Copyright 2022, Clarks Condensed. The cookie is used to store the user consent for the cookies in the category "Performance". I am absolutely blown away with the quality of the Infusible Ink. By drawing, writing, and/or coloring onto regular printer paper, you can create super detailed images and infuse them right onto mugs with the Cricut Mug Press. That way the heat and pressure will be applied evenly to the whole design. I still cannot believe the quality of this. Using any Cricut machine, you can easily draw or write by hand on printer paper and transfer the design onto a mug with the Cricut Mug Press.
Dont worry about coloring over the black Infusible ink pen, the black will come through during the heat transfer. To prepare for Cricut, select the whole design and click attach. Save my name, email, and website in this browser for the next time I comment. Once you select the font, be sure to change the Style from Regular to Writing to ensure the single line writing. Thanks in advance. infusible Start with a new canvas within Cricut Design Space. Ceramic Sublimation Mug and it worked perfectly. I also made this customized pillow for my mom that I created by uploading a card from her parents to Design Space. Lift your EasyPress 2 and remove butcher paper. The text will be thin just like when writing with a regular pen. The ink is truly a part of the ceramic coaster. Typing paper?) mug cannot be used for drinking? You will need the butcher paper and Heat Resistant Tape for this step. Next, add your Draw design on top. TIP! Why? Notice how at the very bottom of my mug, the design ghosted a bit (meaning it smudged). Thank you so much for all the details!! 1 I have to admit Ive only used the butcher paper Cricut provides. See how a tiny bit of the pink/orange blob designs bled onto the paper? If you pull your paper back, and it didnt transfer all the way, you can carefully put it back on your blank and try again. Because I decide to use the Cricut Infusible Ink classic pens to make buffalo check coasters. You will find that Cricut has markers and pens. Duplicate the rectangle until you have four. Your email address will not be published. Hi! 
On my heart design below, see how all the hearts are within the straight vertical edges on either side. This will show fonts that are capable of single line writing. Ill tell you out front, this is a total game changer for your mug designs, so let me show you exactly how to do it! Your email address will not be published. This is a sponsored conversation written by me on behalf of Cricut. I made a whole set for my sunroom and I cannot wait to show you the whole room in the coming weeks. The answer is any printer paper compatible with laser printers.
These rectangles will be used as a coloring guide, but the rectangles themselves will not be transferred onto the mug because we will draw them with regular Cricut pens instead of infusible ink. The good news is that Cricut has a variety of options when it comes to base materials that are compatible with infusible ink. When making a mug with Infusible ink pens, it is often asked what kind of paper is needed. The Cricut Maker, Cricut Explore Air, and Cricut Explore Air 2 can all use infusible ink transfer sheets and infusible ink pens. Now check your email to confirm your subscription. Choose a light pen color these rectangles will serve as a guide and not actually transfer during the heat press. I use my EasyPress 2. Infusible Ink has taken the crafting world by storm. Before we start talking about all about the pens, lets first talk about what Infusible Ink even is! We also use third-party cookies that help us analyze and understand how you use this website. I find this to be more of an issue with working with the transfer sheets over the pens, though. Infusible Ink is an ink transfer material in the form of a transfer sheet or pen that is permanently infused into your base material. Today, Im going to show you how to make mugs with Infusible Ink Pens. Ensure you do not put any drawn design outside the edge, toward the tabs. Advertisement cookies are used to provide visitors with relevant ads and marketing campaigns. Infusible Ink Freehand Markers 2.0, Tropical colors, LEARN HOW TO MAKE A MUG WITH INFUSIBLE INK TRANSFER SHEETS, Cricut Mug Press machine: Everything you need to know | Craftara Creates. Its pretty lightweight and does have a shiny side and a dull side. Like I said, its not necessary, but selecting the right pen is helpful on designs when you use multiple pen colors or weights. Slowly remove liner (Note: If transfer sheet remains on shirt, remove with tweezers). The Cricut machine will continue writing out the text. Place your laser paper on to your easy grip mat and your pens are going to draw directly on there. For detailed instructions on how to do this, click HERE. Start with the Mug Design Setup project file in Cricut Design Space and select your preferred size and edge: Search the Image Library for Draw designs (you can filter for pen-only designs using the left-hand menu buttons) and add them to your mug template. This will ungroup the layers. With all the text in place, unhide the layer with the mug placement guide. NOTE: ONLY the Infusible Ink Transfer Sheet design is on the mug at this point. Next, hide the mug placement guide layer. They cost anywhere from $8.99 to $49.99, depending on the color, how many are in the package, and if they are for the Cricut Maker/Explore or for the Joy. Cricut Design Space makes designing your cupcake toppers a breeze. I am a military spouse, mom to 3 young boys, and a constant creator. Thank you. Load the correct pen into your machine according to the prompts within Design Space. These cookies will be stored in your browser only with your consent. How cool is that? Take note of the discarded laser copy paper in the image above (bottom left corner). Then go ahead and click Make it to send to Cricut. These awesome tools are a great way to create professional-level projects right at home.
What is neat about these markers is when you overlap the colors on the paper it blends them together creating a fun rainbow effect. The design is very detailed and would be extremely tedious to attempt to go back and hand fill-in all those lines, I was hoping there is a simple solution, because if it turned out great, I would likely be making more. The mug handle remains cool but the mug will be extremely hot so you want a safe spot to let it sit and cool down. Grab a heat resistant surface like an EasyPress mat and have it ready for when the mug is done. The file is set up to both draw and cut. Great information. With an iron, you have to move it around quite a bit, and that would make it much more likely that youll mess up your design. There are just so many possibilities. The hardest thing to rememberwhen working with Inf Ink is that they blend like ink/paint would; they dont layer like vinyl or iron-on. Select Align again and Center Horizontally. To create drawn designs on your mugs, here are the supplies you will need: AllCricut Mug Presssupplies are now available at Cricut.com, as well as Target, Walmart, Amazon, Michales, JoAnn, Hobby Lobby, and HSN. Megan. The markers have a thicker, 1.0mm tip while the pens have a .4mm tip. As such, this technique is recommended for brightly-colored, highly-saturated Transfer Sheets and Pens. If you do not wrap the mug in 3 layers of butcher paper, the ink will stain the interior channel of the Cricut Mug Press, making a mess and potentially affecting future designs. Then, decide where you want your design on the mug and tape it in place, ink-side down, using Heat Resistant Tape. When heated, the ink will bleed, A LOT, through the paper. If needed, adjust the size of the font to fit within the rectangle. The Cricut machine will draw the rectangles and will pause when it is time to switch to the black infusible ink pen. The other way to use the Infusible Ink Pens is tolayer drawn designs over images cut from the Infusible Ink Transfer Sheets. Please note if you are creating your own design remember to mirror it. You also have the option to opt-out of these cookies. These cookies ensure basic functionalities and security features of the website, anonymously. Next, select the material.
When creating pen designs for your mugs, its very important that any design you create in Cricut Design Space is set to Draw rather than Cut. If you are unclear about creating pen-friendly designs, see my full Cricut Pen Tutorial HERE. Here are the specific materials I used for the Heart Mug: Cricut Explore Air | Cricut Mug Press | Standard Grip Mat | White Printer Paper | Butcher Paper | Fine Point Infusible Ink Pen in Black | Array of Infusible Ink Markers | 12 oz Mug Blank. She is passionate about sharing her experiences with others - especially about pregnancy, breastfeeding, cooking, and crafts. This cookie is set by GDPR Cookie Consent plugin. Check out all of our Cricut Tutorials and Projects here! You will transfer the two layers of your design separately, so this heating process is a little longer than all the other mugs weve made. Analytical cookies are used to understand how visitors interact with the website. The Infusible Ink pens are especially popular and fun to use. You applied the Infusible Ink Pens to plain ol printer paper. In this case, we will use an Infusible Ink pen because we want the words to transfer during heating. 20+ Outdoor Games for Adults Everyone Will Love! Select the bottom rectangle and the Mug Wrap shape, then click Align, Align Bottom. As long as you set the pressure to copy paper, you will have no issues with leaving cut marks on the mat. This article teaches you everything you need to know about using them and tips and tricks for success! I have pink butcher paper. Butcher paper will come with the transfer sheets. In this instance, I cut the D from a hot pink Infusible Ink Transfer Sheet, and wrote the script name using (the thicker) Black Infusible Ink Marker. When you remove the printer paper layer, youll reveal a vibrant design made from Infusible Ink Pens! I LOVE using these, which is why we need a post totally dedicated to it . It stretches and creates a professional quality t-shirt that you couldve found in a store. Im so glad you find the pictures helpful! I have been so excited to craft with Infusible Ink and I cant wait to teach you everything I have learned so far. Let the mug sit for 15-20 mins or longer if still warm. This will ensure the text is not backwards on the mug. Once cooled remove coaster from design. The mug wrap is pre-set by Cricut to cut twice. Backyard Discovery Cabana Pergola Review (2022), How Much is a Laser Cutting Machine? The cookie is set by the GDPR Cookie Consent plugin and is used to store whether or not user has consented to the use of cookies. Infusible ink must be used on polyester or poly-coated items. These are provided for your convenience, and the price isn't increased at all. Sign up below to unlock theresource libraryand learn about all new tutorials. There really is no right or wrong way to add color.
This tutorial shows the steps used for the Cricut Explore Air 2 and Cricut Maker, however, the Cricut Joy would work too. Not only does this ensure you line up your designs just right, but it also makes sure the entire design is covered when re-pressing. The biggest thing to remember is how to designate each element of your design: Once you click the flashing button on your machine, follow the machine prompts to both Cut and Draw your designs. Not only will your iron likely not get hot enough, but when you are transferring the ink, its pretty sensitive to being moved around. Required fields are marked *. Weve shared a lot about this type of crafting in the past but today we will be talking specifically about Infusible Ink Pens. You can cut them like vinyl and iron on your design the same way you would transfer traditional HTV. That said, it can be helpful to set the specific pen types, so if you use different color pens for different elements, DS will prompt you to load the right pen at the right time. This post may contain affiliate links, which means Ill receive a commission if you purchase through my links, at no extra cost to you.
Unfortunately, the original EasyPress only heats up to 350 degrees. Here are the specific materials I used for the Knitter Mug: Cricut Explore Air | Cricut Mug Press | Standard Grip Mat | White Printer Paper | Butcher Paper | Fine Point Infusible Ink Pen in Black | Rainbow Watercolor Splash Transfer Sheet. It does not store any personal data. Thanks to my husbands career, we have moved 8 times in the last 15 years, and Ive made it my personal mission to decorate, organize, and re-imagine each rental space until it feels like home. Would you share which fonts you used on the Darlene mug please. Often times, printer paper will work with both inkjet and laser printers so be sure to read the packaging. I used a fine tip Infusible Ink Pens, and they worked beautifully for the smaller text and fine details.
Look for the compatible with Infusible Ink seal on packaging. The opinions and text are all mine. To make your own project using infusible ink pens, youll need: You can make a project using Cricut Infusible Ink markers in just a few simple steps: Infusible ink is a great way to create some amazing new designs using your Cricut. To see more of what I mean, please see this guide:https://thehomesihavemade.com/2019/05/how-to-use-cricut-pens-a-comprehensive-guide/. document.getElementById( "ak_js_1" ).setAttribute( "value", ( new Date() ).getTime() ); Clarks Condensed provides uplifting and motivating information to share the joys of home and family living through parenting and pregnancy advice, easy DIY tutorials, recipes, and more all with a frugal twist. Their Infusible Ink line includes: In addition to paying attention to the type of base material youre using, its also good idea to pick base materials that are white or light in color. Lastly, select all the text and Align Center Horizontally to align them perfectly with each other. If you are looking for more compatible blanks, 45+ Infusible Ink Blanks to Try Cricut & Non-Cricut is a great place to start. This is a good time to add any small bits of heat resistant tape to your mug to ensure the paper does not move.
This cookie is set by GDPR Cookie Consent plugin. When double-pressing your mugs, I HIGHLY recommend using the full mug templates for your designs. When you are satisfied with your mug design, Attach everything together, and send the design to cut. With Cricut, you have everything you need to your own birthday. with the clear liner side up. For the Cricut Air model, switch the dial to custom to search for Copy Paper. Any part of your design that you want created from the Infusible Ink Transfer Sheets should be set to Cut, Any part of your design that you want drawn with the Infusible Ink Pens or Markers should be set to Draw, For your Cut layer: Infusible Ink Transfer Sheet, Load the correct pen into your machine according to the prompts within Design Space. Next, wrap the paper mug design around the mug with the color facing the mug and Secure with heat resistant tape. This is SO frustrating when this happens! If you want to freehand draw onto a piece of laser copy paper to transfer to your blank, then I dont see why not! Read more Katie is a Colorado-native, BYU graduated, and most importantly, wife to one and mother to three beautiful boys. then pressed the mug again with the drawn name design over top. TIP! Clarks Condensed provides uplifting and motivating information to share the joys of home and family living through parenting and pregnancy advice, easy DIY tutorials, recipes, and more all with a frugal twist. If you didnt wrap your mug in butcher paper, that ink would be all over the inside of your Cricut Mug Press! Other uncategorized cookies are those that are being analyzed and have not been classified into a category as yet. Place the mug on a heat-safe surface for about 15-2o minutes to cool before handling. Now I chose to use the pen because it was more fine point to get the details I wanted. When the machine beeps, remove your mug by opening the lever and lifting the mug out by the handle. NOTE: The rectangles drawn with the regular Cricut pen will not transfer onto the mug because they are not infusible ink. I highly recommend using the Fine Point Pens (0.4 weight) for drawing, and the Infusible Ink Markers (1.0) or Freehand Markers to color in any designs. Finally, add a protective barrier to protect the Cricut Mug Press from ink bleeding through the paper. Infusible Ink pens dont fill in areas by coloring, so thats something you have to do on your own. Do I use gel setting or regular or does it matter? She is passionate about sharing her experiences with others especially about pregnancy, breastfeeding, cooking, and crafts. The Cricut Mug Press machine has indicator lights to show progress and will beep when the mug is complete. Hope that helps a bit! Infusible ink is a newer type of heat transfer product that comes in two different materials: infusible ink pens and infusible ink transfers. Place coaster with design face down on cardstock. and uncoated? Move the rectangle shapes so they are generally centered and evenly divided. That is because I didnt tape the paper to the mug (like I emphatically state in this tutorial). Make sure the Cricut Mug Press is plugged in and push the power button to pre-heat the machine. Choose Laser Copy Paper from the Custom Materials settings. My name is Tara and I am the creator behind the Craftara Creates blog. Then remove the butcher paper and laser copy paper to see the pen design transferred to the mug! Infusible Ink pens are designed specifically to fit into the Cricut machines pen holder. Here is something that is SO SUPER FUN about using Infusible Ink Pens. In the picture below, Ive only removed the butcher paper. Updated on December 14, 2021 | Published on September 19, 2020. I adore the hand-colored effect of this one! infusible Load your Infusible Ink pen into your Cricut and you are ready to load your mat and make it. Insert cardstock inside t-shirt to prevent bleed through. Press with light pressure at 385F for 40 seconds. Slowly lift your EasyPress 2 and slowly remove butcher paper.Cool Completely. Like I want to use a green marker on a yellow transfer sheet will it change it he color when I go to press it on my mug machine ? Take a look around. Did you find this fun craft project tutorial on how to make a mug with infusible ink pens helpful? Cover with clean butcher paper. One of the drawbacks of using infusible ink is that youll need base materials made from a certain type of material to be successful. The coaster will be very hot. Center machine, press with no pressure at 400F for 240 s without moving your EasyPress 2. After the Cricut machine has completed the cut, remove the mat and gently remove the mug wrap from the mat. Once cool, remove the Infusible Ink Transfer Sheet to reveal your base design. Modern Day Homemaking - Cricut, Glowforge, Family Recipes, and More! However, if you have another cutting machine that the pens will fit into, you should be able to use them still. They dont have as many options, but hopefully they will have more soon. However, you may visit "Cookie Settings" to provide a controlled consent. Clickhereto learn more about me.
When the Cricut Mug Press is pre-heated, slide the mug into the press at an angle and press the lever down to secure the mug in place. I love your tutorials, and your ideas for designs are great!!!! THIS STEP IS VERY IMPORTANT:Next, wrap the mug in 3 layers of white butcher paper and secure with more Heat Resistant Tape. michaels infusible Lets be craft besties and stay in touch. She loves spending time with her family and helping others find joy in family life.
Move the bottom text toward the top of the bottom rectangle to avoid cut off.
Once done, remove both mug designs from your mats and weed as needed (if you need help with this step, click HERE). The first technique I want to teach you is the pen only method, which was used to create the heart mug below. This post compares some different shirt types and how the Infusible Ink held up on them. Well I am about to give you the tiniest sneak peek of my newly renovated sunporch. Do not use your hook tool.
I hope that you will be doing more mug press projects in the future! Looking for even more Cricut help? For my Knitting Lover Mug, I started with the Large Painted Shapes Mug Design (#M1D0152B8) design and then layered individual Draw images from the Knitting Set over each blob. This cookie is set by GDPR Cookie Consent plugin. The Cricut mug press does all the thinking for you with regard to temperature and time. These pens are specifically designed to be able to infused directly into the blank you are working with. The pretty pink handle and inside make for a fun and easy project color combination. Do not touch the coaster until it has cooled completely. This fun craft project to create a mug with infusible ink pens makes beautiful customized gifts that are permanent, dishwasher and microwave safe. If you want to use Infusible Ink pens with the Cricut Joy, you will need to buy the pens specifically designed for it. The cookie is set by GDPR cookie consent to record the user consent for the cookies in the category "Functional". You will see a notification in Cricut Design Space to switch the pen. It seems like this Summer I am permanently in vacation mode so I designed this t-shirt to reflect my mood. This is useful because Cricut will prompt you to change out pens when it begins writing that word. Since the ink infuses itself into the material, youll have the best results when starting with a white canvas. Slowly remove liner (Note: If transfer sheet remains on shirt, remove with tweezers). Fill in the outlined squares with your Infusible Ink pen. Wipe the ceramic coaster with lint-free cloth.
With the center rectangle selected, click duplicate to easily create another shape. This should be ready to make it is already sized for the round ceramic coasters. I must admit, making designs with BOTH the Infusible Ink Transfer Sheets and the Infusible Ink Pens is my absolute favorite method. Think of all the possibilities here! They come in a variety of different colors and tip types. When the mug is cooled, remove the tape and transfer sheet to reveal your beautiful design. But along with that awesome new material comes a new learning curve. Exactly what I was looking for. Make sure the design is mirrored and you have selected Infusible Ink transfer sheets for your material. TIP FOR A PERFECT MUG TRANSFER: For the top text, move it down to align close to the bottom of the first rectangle. You are going to get your best variety on Cricut.com! With the rectangles perfectly positioned, select all four and change the operation to Pen. infusible