Double-check that the coating is peeled off your blank first. I am currently trying to do the cactus one, but found that the black part isnt showing up on the cvs file. Im Sam, and I love color and making happy things. There are coppers and greens and its quite spectacular. Lay out the images in the order to how you will decoupage. You can Download them directly from Account page. Zindee has download instructions on their Facebook page explaining how to download and upload into Cricut Design Space. Doctor of Philosophy from the University of Virginia in 1979, Dr. Howell has treated children, This is a quick 20-30 minute craft that can be done by all skill levels. Which one is your favorite? Trim a small scrap of wood to the desired size using a saw. I mixed a few milliliters of resin together and poured some of it into 4 different cups and in each cup poured different glitters. Resend OTP. document.getElementById( "ak_js_1" ).setAttribute( "value", ( new Date() ).getTime() ); My mission is to develop, encourage, and grow your crafting skills, and confidence through freebies, tutorials, our club, and our signature course. After, I dumped on a liberal amount of gold glitter and tapped off the excess. Having received his Sand to smooth. I like the way that it came out, and it did not damage the acrylic at all. Instead of using glitter vinyl, I used Mod Podge and glitter to cover the design. Feel free to check out the keychains here at this updated link. Married to my best friend, mama to our 13 year old Little Crafter and 15 year old Scout. Craft expert for Good Day PA, Studio 5, Great Day Live Tampa, SA Live!, Arizona Midday, Hello Iowa, AM Northwest, and Midday MD lifestyle shows. I have tons of crafting supplies, so I did some experimenting to see what I could create with things I already had and came up with 10 different techniques for you to try. True story, I just received the Cricut engraving tool for my Maker this week so I was chomping the bit to try it out. Or images from favorite places? I applied a layer of ModPodge with a sponge brush and let it dry for a few minutes. document.getElementById( "ak_js_1" ).setAttribute( "value", ( new Date() ).getTime() ); Very cool! If you like this beginner keychain project, checkout my Cricut maker keychains. I think it turned out well, though my alignment was slightly off. Do you have a favorite keychain technique? Thats when I came up with the idea of creating these fun no resin acrylic key chains. I find it easier to get rid of the hole in Design Space and just poke through with the weeding tool. From the front, this is one of my favorite projects because I love how blingy it is. https://csdsvinyl.com/catalogsearch/result/?q=acrylic+keychain, What do you do if if the glue from the transfer tape transfers to the vinyl image? If you cure UV resin on it, it is easily removed. Learn how to make a keychain using scrap wood and other basic materials. Since everyone makes glitter resin acrylic keychains, I felt that I should attempt to try it since this was my first go-around with keychains, and they were simple to make and turned out absolutely gorgeous. The Rubn Buff color is Autumn Gold, which is between a copper and rose gold, and when mixed with the UV resin, a chemical reaction occurred and the color patinaed into something that resembled an old copper penny.
See my recent article Etching and Painting Glass to learn more about that technique. I chose two images from Cricut Design Space. Always leave the paper on the side of the blank you are not currently working with.
UV resin smells awful and gives me a headache. It didnt work for me at all. If you add too much resin, the "bubble" along the edge will spill over the side of the acrylic. For my Soccer Mom design, I used the same method of mirroring the design. If there is a residue I would first begin to use a different transfer tape and second maybe try something like goo gone to remove it. The best compliment I could receive is that my projects and pictures make you smile. There are so many uses for mason jars that dont include canning or preserves, and with Christmas right around the corner, its time to think of some festive ways to use these versatile glass kitchen storage items to create Christmas mason jar projects.
Very well done. It looks easy enough and even kids can make them! I used Pro Marine Resin for my projects. EVERYTHING NEEDS MORE GLITTER! Zindee sells keychains. Your email address will not be published. Cut out the paper and set aside. Direct Sunlight: I live in Seattle, and this is hard to come by, so my project had to wait until the sunwanted to come out before I could try this, but 20-30 minutes in the direct sun did the trick. To add a little extra protection, you can seal your finished keychain with an acrylic spray sealer or by painting a coat of Mod Podge over your lettering. Tried 76% and 99% rubbing alcohol. Press it down firmly to allow the acrylic key chain to attach firmly. If that is something you are comfortable working with, then I say go for it, but if not, your project will be just fine. Since a little goes a long way with this stuff, I had some lying around. To finish off the project, connect the hook and add the key chain. So many people are searching for ways to find happiness in this world of difficulties, relationship problems and emotional pain. oxoxoxoSarahttps://www.creativejewishmom.com/2012/05/recycled-jar-candle-holders-for-shavous-or-anytime.html, You are right, great idea for fathers day :). Joseph B. Howell, Ph.D., LLC is a clinical psychologist who practices in Anniston, Alabama. The Zindee SVGs have holes in them, but it is super hard to line up the vinyl and the hole. Attach paper to the wood using Mod Podge. Line up the key chain with the keyhole on the vinyl design. I bought these, and they work great. I used my Cricut Mini Heat Press on medium heat to apply Siser Twinkle HTV to the front of my keychain. This is a simple and fun project that can be totally customized to your tastes or even what you have lying around in your craft area. No matter how you make them, theyre sure to be a treasured gift! Is this something that you had to make or am I doing this wrong? adults and families for a wide variety of problems of living. Another option for adding color and sparkle is glitter.
If you are using solid color vinyl, then the solid color will show on both sides. Ive been seeing a ton of fun resin crafts lately and I wanted to create something that looked like resin but without having to use resin which can be complicated and requires special protective gear when handling. I just posted a nice mod podge project yesterday, check it out! Thank for showing how to do this.This is on my list to try. In his ground-breaking book from Balboa Press entitled; Becoming Conscious: The Enneagram's Forgotten Passageway, Dr. Howell reveals simple, yet profound ways to know our deepest selves and the other people in our lives. For our best tips on how to peel off the transfer tape, head over to this post here. Using the transfer tape, its now to apply the vinyl design to the acrylic key chain. There are many materials you can apply to the back to the keychain blank, regardless of what you plan to design on the front. love these! Applying small images such as this is fairly easy to do without getting any air bubbles. Thanks for sharing this valuable information for free. There are a few things I tried on the front surface that were completely new for me, including engraving, which I have never done with my Cricut Maker until now (I know, right!?). Nobody ever shows the back and I am not sure! Let dry. Since the fabric paint I used was gold metallic, it had some elements of shimmer without actually having glitter added, so it gave it a subtle glow. If you do a search on this you will find serious crafters that sell these keychains use UV resin or epoxy and UV dryers. Sometimes they are hard to pop, so just pull them to the edge of the blank and scrape them off. If you are more visual or want to follow along with us, you can watch us put them together in a Facebook live! Yup! The owner of Zindeehas tutorials showing you how to decorate the keychains. Even if youve never Mod Podged before, you can make this project. Can you tell me the font that is used for the H on the coffee cup? I had some extra paint samples from my daughters bedroom so I decided to make her a keychain with those colors, which are her favorites. Let dry. It works great! [] Check the tutorial for Hand-Lettered Acrylic Keychains on amylattacreations.com. My daughter even made her own. They include a jump ring for attaching the keychain, however, I have found larger keychains require larger more substantial jump rings. In this tutorial, we'll show you how to seal vinyl on a piece of acrylic using UV resin. Mirror your image, as you will apply the design to the back side of the circle and decorate over the image. If it does, you can clean up the edges of the acrylic with a paper towel and isopropyl alcohol. In fact, I let my kids design their own with the glitter colors and images they wanted. I used a variety of permanent vinyl, glitter vinyl, and holographic vinyl on the front of my keychains. Since I didnt want the paint to rub off, I applied Diamond Glaze over the top of it to seal it and give it a glossy surface. Posted on Last updated: December 28, 2021, Home / Craft Ideas / Cheap Crafts / How to Make a Keychain on a Budget. When I press from the center out I am able to avoid the bubbles, but a heat gun and the wet method are both great options , One more question lol. jQuery(document).ready(function () { If youd like to add one of the tassels, you can add it to either the top or bottom jump ring, or slide it onto the keyring itself.
Its so much fun to use vinyl designs to create everyday items. Adhesive Vinyl Crafts Project Inspiration. While the paint is still wet, add the polymer clay slices. Diamond Glaze with latex paint and metallic fabric paint. It is also frustrating to work with, as bubbles appear in it during the curing process. Addicted to Starbucks. The circle file comes with two circle images one for the front of the circle and a larger one for the back. Several people asked about sealing the design, and here are my thoughts. Pen and Pencil Storage for Craft Room These nail art slices are also often used in making slime. Feel free to post them over in our FB group, give us a tag on IG, or pop us a note and let us know what you are creating. I found this tutorial really helpful but how big, in inches, was the circle charm? jQuery('#digital-item-countdown-32852217').countdown(cdown32852217.toDate(), function (event) {
Reach and email their customer support and they should send them right over to you . Keeping the vinyl on the transfer tape, bring your blank to the vinyl and transfer tape instead of the other way around. Its something everyone can use, and you can make it completely unique, using any combination of colors and words you like. Carefully, rotate and tilt the acrylic to get the resin moving evenly towards the edges. I am very pleased with this simple and yet durable item. I had some black chalk paint leftover from a playroom project and I decided to see if that would work well on the acrylic. jQuery('#digital-item-countdown-4672808').countdown(cdown4672808.toDate(), function (event) { You can have a personalized stylish key holder to show off to your friends, give as gifts, and keep for yourself in no time. How do you avoid the adhesive look on the opposite side of acrylic. Looking for a personalized gift thats perfect for dads, grads, or anyone else in your life? Your email address will not be published.
Happy creating! 2022 Color Made Happy | Designed By Harrelson Media. Hi! }); jQuery(document).ready(function () { If you want your keychain to sparkle, try applying a thick coat of Glitterific paint instead! I used Diamond Glaze to seal the back. So unless you are going to be selling these, I would stick with Diamond Glaze. Placeyour acrylic on a silicone matto protect your work surface. Also, at this point, try to minimize touching the key chain because it leaves fingerprints really easily. Then, use a silicone tipped tool to start carefully pulling the UV resin towards the very edge of the acrylic. Once it dried, I applied Diamond Glaze over the top and let it dry. His lectures on stress reduction, This post will focus on beginner level designs, but I will post more showing how to make more advanced designs. It was dry but the surface was slightly tacky and when I touched it, it would stickto my fingers and leave indents on the surface of the resin. . This is an easy-to-make project to gift for birthdays, end-of-year teacher thank you gifts, or even for anyone who enjoys homemade gifts. Draw a second line in each of those spots, color the space in between, and youll have the word dad written in a beautiful brush script font. So you put your keychain into the dryer looking perfect, and it often comes out full of bubbles. The circle blank comes in a variety of sizes and is the most versatile by far. Dr. Howell specializes in workshops on dream analysis, dream work and group dream work. Rubbing Alcohol: With this process, you rub isopropyl alcohol onto the project to remove any residual tackiness on the surface. This is what the blank looks like before the coating is removed. VAT: NL858147877B01, Your data is securely handled by our partners, No email received? I made the initial slightly larger than I should have, but overall, its sweet and simple. Heres how you can make a key chain with any images that you fancy. Thanks for your help. Next, its time to weed the vinyl design; if you arent quite sure what I mean with this, head over to this post, where we decode the crafter lingo for you. 2008 - 2022 Amy Anderson Crafts LLC | All Rights Reserved | Birch on Trellis Framework by Mediavine, DIY Photo Keychain for Mothers Day (Gift Idea! Trace the wood onto paper. Comment below and let me know! This will keep that side from getting adhesive on it during the decorating process. To show your appreciation, you can add this article to your favorites or share it. Practice Makes Progress: My Creative Journal, Express Yourself: A Hand Lettering Workbook for Kids, Free Herb Garden Stencils + 3 Easy Projects . Since bubbles occur often with UV resin, I used a lighter to heat the top of the resin to get the bubbles out, and it worked immediately to remove them. Plus I love that they can easily be personalized keychains for gifts. Without the seal, it is more susceptible to peeling and scratches. Have fun and adorn your keychain with charms, tassels, andbeads galore! Prepyour piece of acrylic by rubbing it down with a paper towel and isopropyl alcohol. These arent sealed, but I might experiment with that in the future. Are you ready to make a keychain? document.getElementById( "ak_js_1" ).setAttribute( "value", ( new Date() ).getTime() ); This site uses Akismet to reduce spam. Im not sure I know what you mean by film look. Why not create a one-of-a-kind keychain? My main concern was the fumes. I just bought a silicone basting brush at the Dollar Tree and cut the pieces off and use them to plug the holes. If that's not working, it probably means that you need to add resin, but only do so a drop at a time. Totally dry! If you continue to use this site we will assume that you are happy with it. Every week we release new premium Graphics for free, some available for a limited time only. You can even create a faux resin look using acrylic storage and clay nail art slices. It has so many uses.
Acrylic key chains are blanks that everyone should own in their crafting stash. Paint the wood with acrylic paint. Amsterdam, The Netherlands, Chamber of Commerce: 70114412 My favorite tool for getting the bubbles out is a squeegee that came with a cell phone screen protector. I used a Lily-inspired patterned vinyl for the acrylic blank to really help make it pop. There are so many fun possibilities with this paper roll craft and a ton of fun animals, Read More DIY Paper Roll Craft Pencil HolderContinue, If you didnt already know, we love the alphabet at our house and have an entire wall dedicated to it. The SVG designs come free with the acrylic blank, and if for some reason yours doesnt pop up in your order history, make sure to shoot CSDS vinyl a note, and they will send it right over. concentrated his studies in psychology and religion. Using the supplies I have listed below, and following the step-by-step tutorial, you too can have a beautiful acrylic key chain. jQuery(this).html(event.strftime('Gone in %-Hh %-Mm %-Ss')); professional and religious organizations have engaged Dr. Howell to present to them on these and I only used the smaller in my design. These can be personalized and make great gifts. The left side and stem of the a are downstrokes as well. As an Amazon Associate, I earn from qualifying purchases. If you want to add additional artwork you can paint on your keychain design, use acrylic paint and apply 2 coats for an even finish. Make a keychain using old wood scraps, your favorite image and Mod Podge. It has a film look.
Skills Required: Beginner. I bought a bunch of keychains from CSDS but they didnt come with svg file. If your vinyl covers the holes, just use a weeding tool to poke through it. Here is an example of some of the prints I used: If patterned vinyl is used, make sure you know its not double-sided with patterns on both sides. Your email address will not be published. I'm so are glad you are here and hope you find inspiration and confidence to create something beautiful out of the chaos in your craft room and in life. These step-by-step instructions for how to make acrylic key chains are easy to follow and simple to understand. The best thing to do is purchase a strong UV light if you live in the Pacific Northwest like I do or allow them to cure in the natural sunlight. I did, but the svg on the coffee tumber is just one piece of the entire tumbler, I like yours much better! Water Curing: This is a process by which you allow the project to dry mostly and if it is still tacky, you put it into water to finish the curing process. Once the paint is dry, add a thin layer of Mod Podge over the top of the polymer slices. jQuery(this).html(event.strftime('Gone in %-Hh %-Mm %-Ss')); Lets have a moment of silence for those that were lost. I do have one question. That's a lot of trial and error experimenting. Dr. Howell also received in 1974, a Master of Arts in Religion from Yale Divinity School, where he Feel free to post over in our Facebook group or email [emailprotected] with pictures if youd like some more help on it. Subscribe to the newsletter for all our latest! Make sure you are following along with my on Instagram, Facebook or TikTok see more colorful and crafty projects. You can keep things very simple with just a monogram, or you can letter a name or phrase. Lost your password? I used a pair of tweezers to make placement even easier. Available for 1 week only, so act fast! Use a straight pin to pop any bubbles that form. You don't need much, and less is better than more because it's always easier to add more, than it is to remove excess. And thanks to the laws of physics, the UV resin will make a lovely bubble-like ridge at the edge of the acrylic. Check out the tutorial for how to layer adhesive vinyl here. Do you always put some vinyl on the back for dimension or is it just what you feel at the time, It just depends what I want the key chain to look like. If you're seeing "dimples" in the resin, try spreading more resin to that area to smooth it out. Im not sure I know a crafter who doesnt have some form of ModPodge in their supply closet. If it feels sticky, then it needs to be cured a little more until it is no longer sticky. Assortment of smaller wood pieces, like kids building blocks or small scraps of wood. It gave it a smooth, silky finish on the back.
Over years of research and practice, Dr. Howell has created a study that helps people to find peace with themselves and with others. Squirt a small blob of UV resin into the middle of the acrylic.
For example, in the word, dad, your pen moves down on the left side of each d as well as the left side of the stem. This is where you can also add in the decorative tassels. var cdown31039662 = moment.tz('2022-07-31 00:00:00', 'America/Chicago'); This vinyl is from Zindee and is amazing. This is a fun art project that can be done in one sitting. No the printed vinyl is not double sided. One of my favorite things to do with Mod Podge is make gift items. I have to use the wet method to get the same results. Many keychains were ruined. Both didnt work. Some people do use resin and epoxy to coat and seal the acrylic blank. Flip the keychain over and letter your word or message on the other side using a fine tip paint marker or permanent marker. You will receive a link to create a new password via email. Step 5: Attach the keychain link to the screw eye using pliers. Acrylic Keychain Blanks Kit(includes 30 each of blanks, chain, jump rings, tassels, and key rings), Acrylic/multi-surface paint in your choice of color(s), Fine tip paint pen (I used gold and black) OR Permanent marker. I was pretty impressed with what worked well and what didnt work so great, and I cant wait to share what I learned with you. Check them out now. Its a fun end of summer craft to commemorate the months of fun in the water. Gingerbread House Craft Supplies (affiliate links provided for, Read More Gingerbread House CraftContinue, Im a huge fan of creating your own storage out of recycled materials. jQuery(this).html(event.strftime('Gone in %-Hh %-Mm %-Ss'));
The possibilities are endless, and I hope you try your hand and creating some.
Check them out now. Its a fun end of summer craft to commemorate the months of fun in the water. Gingerbread House Craft Supplies (affiliate links provided for, Read More Gingerbread House CraftContinue, Im a huge fan of creating your own storage out of recycled materials. jQuery(this).html(event.strftime('Gone in %-Hh %-Mm %-Ss'));
The possibilities are endless, and I hope you try your hand and creating some.
), DIY Resin Keychains Make Great Handmade Gifts, Personalized Wooden Keychains Make Great Gifts, Wine Bottle Decor: 35+ Great Crafts for Your Home. UV light: This method works best if you have a UV light that is 36W or greater. Making your own key chain with vinyl has never been easier. Good luck and hope that helps!
Remember, this is a keychain that will be heavily used, hence a strong sealer is ideal for durability. You could also add a permanent vinyl Cricut design to this keychain project as well. Sure you can grab that font here from my affiliate link: https://fontbundles.net/craftylittlenodes/129620-intially-a-hand-lettered-monogram-font/rel=LlkUnv , I have ask this question on other sites and no one will answer me. Because I mirrored my design, I do not have to worry about sealing the front of the keychain. Learn how to use adhesive vinyl to make a DIY acrylic key chain. You are benefiting from my hours of research and trial and error not to mention all the money I spent trying different products. . Use pliers to close the jump ring.
Create a wintery shadow box for your bedroom! Dont use a small, inexpensive nail-curing light. You can also always design your own! The Ultimate Guide to Cosmetic Packaging Wholesale Supplies, A Little Kindness Monster: Knitted 2 Ways, Acrylic keychain blanks, mine are clear 2 round blanks, Latex paint (I used leftover sample paints that I had), Chalk paint (again, leftovers from another project), UV Light (and sunlight to cure the resin), Cricut Maker with fine point blade and engraving blade. Step 1: Paint a stripe of color one one side of the acrylic blank.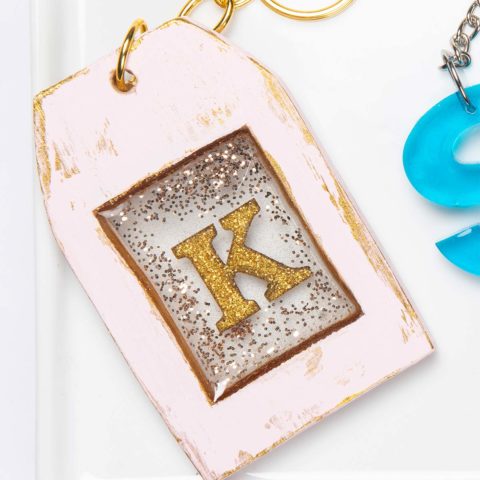
This is a great place to get. How to Make a Memorial Ornament with Signature, How to Make a Bubblegum Bead Keychain or Ornament. You can find the monogram font used on this acrylic keychain in the Ultimate Crafter's Font Bundle. I used firm pressure for 20-30 seconds, then I let it cool. Im wondering if this was ever solved as I think I have the same question. Along with some wonderful successes. As long as you use permanent adhesive vinyl, you can trust it to stick on its own. Subscribe below to get your freebie in the first email!
Then, use a paintbrush to apply whatever color paint stripe you like using your favorite acrylic or multi-surface paint.
This is the part where you can let your creativity shine. It is glittery from the back, but front the front, you can see some of the brush strokes and no glitter shining through. I think its fun to add in names, initials, school colors, bible verses, or really whatever you want to your designs. Slide an open jump ring through the hole in the blank, then attach the chain and keyring. You can see the brown paper covering the front of the circle. I painted the back to the keychain with a sponge brush and dusted some gold glitter flakes on the wet paint and let it dry. They are super cute, very trendy, and so easy to personalize. Ive tried alcohol, if that works do you have to do soak it with the paper towel? healing, and combating mental illness are sought after by many groups. Let the Mod Podge dry overnight before sealing it with the Diamond Glaze. is also a regionally known expert on the Enneagram, a method
Thanks so much! With much practice, I discovered the trick to applying the Diamond Glaze is to hold the bottle sideways when applying it. the video looks like you put it on the back. The project has a dense amount of glitter which I loved, but the back surface is bumpy and unappealing. . A native of Mobile, Alabama, Dr. Howell has lived and worked in Anniston since 1979. These are hand lettered acrylic keychains and you can make customized ones with your own choice of letters on them. Required fields are marked *. Step 3: Use an awl to mark center of the top part of the keychain for the screw eye. The Best Glitter Paint for Art and Craft Projects, Polymer Slices polymer clay nail slices come in variety of colors, themes and shapes. Your email address will not be published. I would make these again and again because co-workers, friends, and my kids, who saw these all wanted one. Thanks! I let it dry overnight and then I painted another layer of ModPodge over the glitter to seal it. Zindeegives you a digital download of an SVGfile for each acrylic blank you purchase. Cosmetic packaging wholesale supplies are in business and high demand at present. This site uses Akismet to reduce spam. I tried so many different techniques that all came out well. 12/6/2021. I LOVE these! Recently, I shared how you can create custom keychains using your Cricut machine and permanent vinyl.
They are nice quality and a good value. Please Note: This post contains affiliate links. What do you think? Peel off the transfer tape so that the design is left on the acrylic.
See my recent article Etching and Painting Glass to learn more about that technique. I chose two images from Cricut Design Space. Always leave the paper on the side of the blank you are not currently working with.
UV resin smells awful and gives me a headache. It didnt work for me at all. If you add too much resin, the "bubble" along the edge will spill over the side of the acrylic. For my Soccer Mom design, I used the same method of mirroring the design. If there is a residue I would first begin to use a different transfer tape and second maybe try something like goo gone to remove it. The best compliment I could receive is that my projects and pictures make you smile. There are so many uses for mason jars that dont include canning or preserves, and with Christmas right around the corner, its time to think of some festive ways to use these versatile glass kitchen storage items to create Christmas mason jar projects.
Very well done. It looks easy enough and even kids can make them! I used Pro Marine Resin for my projects. EVERYTHING NEEDS MORE GLITTER! Zindee sells keychains. Your email address will not be published. Cut out the paper and set aside. Direct Sunlight: I live in Seattle, and this is hard to come by, so my project had to wait until the sunwanted to come out before I could try this, but 20-30 minutes in the direct sun did the trick. To add a little extra protection, you can seal your finished keychain with an acrylic spray sealer or by painting a coat of Mod Podge over your lettering. Tried 76% and 99% rubbing alcohol. Press it down firmly to allow the acrylic key chain to attach firmly. If that is something you are comfortable working with, then I say go for it, but if not, your project will be just fine. Since a little goes a long way with this stuff, I had some lying around. To finish off the project, connect the hook and add the key chain. So many people are searching for ways to find happiness in this world of difficulties, relationship problems and emotional pain. oxoxoxoSarahttps://www.creativejewishmom.com/2012/05/recycled-jar-candle-holders-for-shavous-or-anytime.html, You are right, great idea for fathers day :). Joseph B. Howell, Ph.D., LLC is a clinical psychologist who practices in Anniston, Alabama. The Zindee SVGs have holes in them, but it is super hard to line up the vinyl and the hole. Attach paper to the wood using Mod Podge. Line up the key chain with the keyhole on the vinyl design. I bought these, and they work great. I used my Cricut Mini Heat Press on medium heat to apply Siser Twinkle HTV to the front of my keychain. This is a simple and fun project that can be totally customized to your tastes or even what you have lying around in your craft area. No matter how you make them, theyre sure to be a treasured gift! Is this something that you had to make or am I doing this wrong? adults and families for a wide variety of problems of living. Another option for adding color and sparkle is glitter.
If you are using solid color vinyl, then the solid color will show on both sides. Ive been seeing a ton of fun resin crafts lately and I wanted to create something that looked like resin but without having to use resin which can be complicated and requires special protective gear when handling. I just posted a nice mod podge project yesterday, check it out! Thank for showing how to do this.This is on my list to try. In his ground-breaking book from Balboa Press entitled; Becoming Conscious: The Enneagram's Forgotten Passageway, Dr. Howell reveals simple, yet profound ways to know our deepest selves and the other people in our lives. For our best tips on how to peel off the transfer tape, head over to this post here. Using the transfer tape, its now to apply the vinyl design to the acrylic key chain. There are many materials you can apply to the back to the keychain blank, regardless of what you plan to design on the front. love these! Applying small images such as this is fairly easy to do without getting any air bubbles. Thanks for sharing this valuable information for free. There are a few things I tried on the front surface that were completely new for me, including engraving, which I have never done with my Cricut Maker until now (I know, right!?). Nobody ever shows the back and I am not sure! Let dry. Since the fabric paint I used was gold metallic, it had some elements of shimmer without actually having glitter added, so it gave it a subtle glow. If you do a search on this you will find serious crafters that sell these keychains use UV resin or epoxy and UV dryers. Sometimes they are hard to pop, so just pull them to the edge of the blank and scrape them off. If you are more visual or want to follow along with us, you can watch us put them together in a Facebook live! Yup! The owner of Zindeehas tutorials showing you how to decorate the keychains. Even if youve never Mod Podged before, you can make this project. Can you tell me the font that is used for the H on the coffee cup? I had some extra paint samples from my daughters bedroom so I decided to make her a keychain with those colors, which are her favorites. Let dry. It works great! [] Check the tutorial for Hand-Lettered Acrylic Keychains on amylattacreations.com. My daughter even made her own. They include a jump ring for attaching the keychain, however, I have found larger keychains require larger more substantial jump rings. In this tutorial, we'll show you how to seal vinyl on a piece of acrylic using UV resin. Mirror your image, as you will apply the design to the back side of the circle and decorate over the image. If it does, you can clean up the edges of the acrylic with a paper towel and isopropyl alcohol. In fact, I let my kids design their own with the glitter colors and images they wanted. I used a variety of permanent vinyl, glitter vinyl, and holographic vinyl on the front of my keychains. Since I didnt want the paint to rub off, I applied Diamond Glaze over the top of it to seal it and give it a glossy surface. Posted on Last updated: December 28, 2021, Home / Craft Ideas / Cheap Crafts / How to Make a Keychain on a Budget. When I press from the center out I am able to avoid the bubbles, but a heat gun and the wet method are both great options , One more question lol. jQuery(document).ready(function () { If youd like to add one of the tassels, you can add it to either the top or bottom jump ring, or slide it onto the keyring itself.
Its so much fun to use vinyl designs to create everyday items. Adhesive Vinyl Crafts Project Inspiration. While the paint is still wet, add the polymer clay slices. Diamond Glaze with latex paint and metallic fabric paint. It is also frustrating to work with, as bubbles appear in it during the curing process. Addicted to Starbucks. The circle file comes with two circle images one for the front of the circle and a larger one for the back. Several people asked about sealing the design, and here are my thoughts. Pen and Pencil Storage for Craft Room These nail art slices are also often used in making slime. Feel free to post them over in our FB group, give us a tag on IG, or pop us a note and let us know what you are creating. I found this tutorial really helpful but how big, in inches, was the circle charm? jQuery('#digital-item-countdown-32852217').countdown(cdown32852217.toDate(), function (event) {
Reach and email their customer support and they should send them right over to you . Keeping the vinyl on the transfer tape, bring your blank to the vinyl and transfer tape instead of the other way around. Its something everyone can use, and you can make it completely unique, using any combination of colors and words you like. Carefully, rotate and tilt the acrylic to get the resin moving evenly towards the edges. I am very pleased with this simple and yet durable item. I had some black chalk paint leftover from a playroom project and I decided to see if that would work well on the acrylic. jQuery('#digital-item-countdown-4672808').countdown(cdown4672808.toDate(), function (event) { You can have a personalized stylish key holder to show off to your friends, give as gifts, and keep for yourself in no time. How do you avoid the adhesive look on the opposite side of acrylic. Looking for a personalized gift thats perfect for dads, grads, or anyone else in your life? Your email address will not be published.
Happy creating! 2022 Color Made Happy | Designed By Harrelson Media. Hi! }); jQuery(document).ready(function () { If you want your keychain to sparkle, try applying a thick coat of Glitterific paint instead! I used Diamond Glaze to seal the back. So unless you are going to be selling these, I would stick with Diamond Glaze. Placeyour acrylic on a silicone matto protect your work surface. Also, at this point, try to minimize touching the key chain because it leaves fingerprints really easily. Then, use a silicone tipped tool to start carefully pulling the UV resin towards the very edge of the acrylic. Once it dried, I applied Diamond Glaze over the top and let it dry. His lectures on stress reduction, This post will focus on beginner level designs, but I will post more showing how to make more advanced designs. It was dry but the surface was slightly tacky and when I touched it, it would stickto my fingers and leave indents on the surface of the resin. . This is an easy-to-make project to gift for birthdays, end-of-year teacher thank you gifts, or even for anyone who enjoys homemade gifts. Draw a second line in each of those spots, color the space in between, and youll have the word dad written in a beautiful brush script font. So you put your keychain into the dryer looking perfect, and it often comes out full of bubbles. The circle blank comes in a variety of sizes and is the most versatile by far. Dr. Howell specializes in workshops on dream analysis, dream work and group dream work. Rubbing Alcohol: With this process, you rub isopropyl alcohol onto the project to remove any residual tackiness on the surface. This is what the blank looks like before the coating is removed. VAT: NL858147877B01, Your data is securely handled by our partners, No email received? I made the initial slightly larger than I should have, but overall, its sweet and simple. Heres how you can make a key chain with any images that you fancy. Thanks for your help. Next, its time to weed the vinyl design; if you arent quite sure what I mean with this, head over to this post, where we decode the crafter lingo for you. 2008 - 2022 Amy Anderson Crafts LLC | All Rights Reserved | Birch on Trellis Framework by Mediavine, DIY Photo Keychain for Mothers Day (Gift Idea! Trace the wood onto paper. Comment below and let me know! This will keep that side from getting adhesive on it during the decorating process. To show your appreciation, you can add this article to your favorites or share it. Practice Makes Progress: My Creative Journal, Express Yourself: A Hand Lettering Workbook for Kids, Free Herb Garden Stencils + 3 Easy Projects . Since bubbles occur often with UV resin, I used a lighter to heat the top of the resin to get the bubbles out, and it worked immediately to remove them. Plus I love that they can easily be personalized keychains for gifts. Without the seal, it is more susceptible to peeling and scratches. Have fun and adorn your keychain with charms, tassels, andbeads galore! Prepyour piece of acrylic by rubbing it down with a paper towel and isopropyl alcohol. These arent sealed, but I might experiment with that in the future. Are you ready to make a keychain? document.getElementById( "ak_js_1" ).setAttribute( "value", ( new Date() ).getTime() ); This site uses Akismet to reduce spam. Im not sure I know what you mean by film look. Why not create a one-of-a-kind keychain? My main concern was the fumes. I just bought a silicone basting brush at the Dollar Tree and cut the pieces off and use them to plug the holes. If that's not working, it probably means that you need to add resin, but only do so a drop at a time. Totally dry! If you continue to use this site we will assume that you are happy with it. Every week we release new premium Graphics for free, some available for a limited time only. You can even create a faux resin look using acrylic storage and clay nail art slices. It has so many uses.
Acrylic key chains are blanks that everyone should own in their crafting stash. Paint the wood with acrylic paint. Amsterdam, The Netherlands, Chamber of Commerce: 70114412 My favorite tool for getting the bubbles out is a squeegee that came with a cell phone screen protector. I used a Lily-inspired patterned vinyl for the acrylic blank to really help make it pop. There are so many fun possibilities with this paper roll craft and a ton of fun animals, Read More DIY Paper Roll Craft Pencil HolderContinue, If you didnt already know, we love the alphabet at our house and have an entire wall dedicated to it. The SVG designs come free with the acrylic blank, and if for some reason yours doesnt pop up in your order history, make sure to shoot CSDS vinyl a note, and they will send it right over. concentrated his studies in psychology and religion. Using the supplies I have listed below, and following the step-by-step tutorial, you too can have a beautiful acrylic key chain. jQuery(this).html(event.strftime('Gone in %-Hh %-Mm %-Ss')); professional and religious organizations have engaged Dr. Howell to present to them on these and I only used the smaller in my design. These can be personalized and make great gifts. The left side and stem of the a are downstrokes as well. As an Amazon Associate, I earn from qualifying purchases. If you want to add additional artwork you can paint on your keychain design, use acrylic paint and apply 2 coats for an even finish. Make a keychain using old wood scraps, your favorite image and Mod Podge. It has a film look.
Skills Required: Beginner. I bought a bunch of keychains from CSDS but they didnt come with svg file. If your vinyl covers the holes, just use a weeding tool to poke through it. Here is an example of some of the prints I used: If patterned vinyl is used, make sure you know its not double-sided with patterns on both sides. Your email address will not be published. I'm so are glad you are here and hope you find inspiration and confidence to create something beautiful out of the chaos in your craft room and in life. These step-by-step instructions for how to make acrylic key chains are easy to follow and simple to understand. The best thing to do is purchase a strong UV light if you live in the Pacific Northwest like I do or allow them to cure in the natural sunlight. I did, but the svg on the coffee tumber is just one piece of the entire tumbler, I like yours much better! Water Curing: This is a process by which you allow the project to dry mostly and if it is still tacky, you put it into water to finish the curing process. Once the paint is dry, add a thin layer of Mod Podge over the top of the polymer slices. jQuery(this).html(event.strftime('Gone in %-Hh %-Mm %-Ss')); Lets have a moment of silence for those that were lost. I do have one question. That's a lot of trial and error experimenting. Dr. Howell also received in 1974, a Master of Arts in Religion from Yale Divinity School, where he Feel free to post over in our Facebook group or email [emailprotected] with pictures if youd like some more help on it. Subscribe to the newsletter for all our latest! Make sure you are following along with my on Instagram, Facebook or TikTok see more colorful and crafty projects. You can keep things very simple with just a monogram, or you can letter a name or phrase. Lost your password? I used a pair of tweezers to make placement even easier. Available for 1 week only, so act fast! Use a straight pin to pop any bubbles that form. You don't need much, and less is better than more because it's always easier to add more, than it is to remove excess. And thanks to the laws of physics, the UV resin will make a lovely bubble-like ridge at the edge of the acrylic. Check out the tutorial for how to layer adhesive vinyl here. Do you always put some vinyl on the back for dimension or is it just what you feel at the time, It just depends what I want the key chain to look like. If you're seeing "dimples" in the resin, try spreading more resin to that area to smooth it out. Im not sure I know a crafter who doesnt have some form of ModPodge in their supply closet. If it feels sticky, then it needs to be cured a little more until it is no longer sticky. Assortment of smaller wood pieces, like kids building blocks or small scraps of wood. It gave it a smooth, silky finish on the back.
Over years of research and practice, Dr. Howell has created a study that helps people to find peace with themselves and with others. Squirt a small blob of UV resin into the middle of the acrylic.
For example, in the word, dad, your pen moves down on the left side of each d as well as the left side of the stem. This is where you can also add in the decorative tassels. var cdown31039662 = moment.tz('2022-07-31 00:00:00', 'America/Chicago'); This vinyl is from Zindee and is amazing. This is a fun art project that can be done in one sitting. No the printed vinyl is not double sided. One of my favorite things to do with Mod Podge is make gift items. I have to use the wet method to get the same results. Many keychains were ruined. Both didnt work. Some people do use resin and epoxy to coat and seal the acrylic blank. Flip the keychain over and letter your word or message on the other side using a fine tip paint marker or permanent marker. You will receive a link to create a new password via email. Step 5: Attach the keychain link to the screw eye using pliers. Acrylic Keychain Blanks Kit(includes 30 each of blanks, chain, jump rings, tassels, and key rings), Acrylic/multi-surface paint in your choice of color(s), Fine tip paint pen (I used gold and black) OR Permanent marker. I was pretty impressed with what worked well and what didnt work so great, and I cant wait to share what I learned with you.
Check them out now. Its a fun end of summer craft to commemorate the months of fun in the water. Gingerbread House Craft Supplies (affiliate links provided for, Read More Gingerbread House CraftContinue, Im a huge fan of creating your own storage out of recycled materials. jQuery(this).html(event.strftime('Gone in %-Hh %-Mm %-Ss'));
The possibilities are endless, and I hope you try your hand and creating some. ), DIY Resin Keychains Make Great Handmade Gifts, Personalized Wooden Keychains Make Great Gifts, Wine Bottle Decor: 35+ Great Crafts for Your Home. UV light: This method works best if you have a UV light that is 36W or greater. Making your own key chain with vinyl has never been easier. Good luck and hope that helps!
Remember, this is a keychain that will be heavily used, hence a strong sealer is ideal for durability. You could also add a permanent vinyl Cricut design to this keychain project as well. Sure you can grab that font here from my affiliate link: https://fontbundles.net/craftylittlenodes/129620-intially-a-hand-lettered-monogram-font/rel=LlkUnv , I have ask this question on other sites and no one will answer me. Because I mirrored my design, I do not have to worry about sealing the front of the keychain. Learn how to use adhesive vinyl to make a DIY acrylic key chain. You are benefiting from my hours of research and trial and error not to mention all the money I spent trying different products. . Use pliers to close the jump ring.
Create a wintery shadow box for your bedroom! Dont use a small, inexpensive nail-curing light. You can also always design your own! The Ultimate Guide to Cosmetic Packaging Wholesale Supplies, A Little Kindness Monster: Knitted 2 Ways, Acrylic keychain blanks, mine are clear 2 round blanks, Latex paint (I used leftover sample paints that I had), Chalk paint (again, leftovers from another project), UV Light (and sunlight to cure the resin), Cricut Maker with fine point blade and engraving blade. Step 1: Paint a stripe of color one one side of the acrylic blank.
This is a great place to get. How to Make a Memorial Ornament with Signature, How to Make a Bubblegum Bead Keychain or Ornament. You can find the monogram font used on this acrylic keychain in the Ultimate Crafter's Font Bundle. I used firm pressure for 20-30 seconds, then I let it cool. Im wondering if this was ever solved as I think I have the same question. Along with some wonderful successes. As long as you use permanent adhesive vinyl, you can trust it to stick on its own. Subscribe below to get your freebie in the first email!
Then, use a paintbrush to apply whatever color paint stripe you like using your favorite acrylic or multi-surface paint.
This is the part where you can let your creativity shine. It is glittery from the back, but front the front, you can see some of the brush strokes and no glitter shining through. I think its fun to add in names, initials, school colors, bible verses, or really whatever you want to your designs. Slide an open jump ring through the hole in the blank, then attach the chain and keyring. You can see the brown paper covering the front of the circle. I painted the back to the keychain with a sponge brush and dusted some gold glitter flakes on the wet paint and let it dry. They are super cute, very trendy, and so easy to personalize. Ive tried alcohol, if that works do you have to do soak it with the paper towel? healing, and combating mental illness are sought after by many groups. Let the Mod Podge dry overnight before sealing it with the Diamond Glaze. is also a regionally known expert on the Enneagram, a method
Thanks so much! With much practice, I discovered the trick to applying the Diamond Glaze is to hold the bottle sideways when applying it. the video looks like you put it on the back. The project has a dense amount of glitter which I loved, but the back surface is bumpy and unappealing. . A native of Mobile, Alabama, Dr. Howell has lived and worked in Anniston since 1979. These are hand lettered acrylic keychains and you can make customized ones with your own choice of letters on them. Required fields are marked *. Step 3: Use an awl to mark center of the top part of the keychain for the screw eye. The Best Glitter Paint for Art and Craft Projects, Polymer Slices polymer clay nail slices come in variety of colors, themes and shapes. Your email address will not be published. I would make these again and again because co-workers, friends, and my kids, who saw these all wanted one. Thanks! I let it dry overnight and then I painted another layer of ModPodge over the glitter to seal it. Zindeegives you a digital download of an SVGfile for each acrylic blank you purchase. Cosmetic packaging wholesale supplies are in business and high demand at present. This site uses Akismet to reduce spam. I tried so many different techniques that all came out well. 12/6/2021. I LOVE these! Recently, I shared how you can create custom keychains using your Cricut machine and permanent vinyl.
They are nice quality and a good value. Please Note: This post contains affiliate links. What do you think? Peel off the transfer tape so that the design is left on the acrylic.